Details
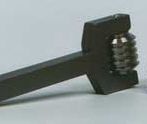
The Harrow glaze thickness tool consists of a handle and a "harrow". The harrow is manufactured to clients specific requirements and consists of a hardened steel barrel into which are machined a number of blades. There are two outer blades and three glaze thickness measurement blades. These are set to show the minimum and maximum thickness of glaze required and an extra blade to show either 1/1000 inch or .02mm over maximum
The harrow is rolled across the wear leaving grooves - two from the outer wheels and then you count the number of additional grooves
No additional grooves indicate that there is not enough glaze
1 shows that there is at least the minimum thickness of glaze,
2 shows that there is the maximum thickness of glaze,
3 shows that there is more than the maximum thickness of glaze
The test is none destructive as the glaze will flow on firing to fill the narrow grooves left by the harrow
Alternative methods for measuring glaze thickness include
Pocket Microscope - MIC002 - a destructive test for measurment of the thickness of fired glaze
Glaze Thickness Penetrometer - for measurment of the thickness of unfired glaze
Ultra Sonic 456 For on line measurement of unfired glaze where robotic spraying is used
